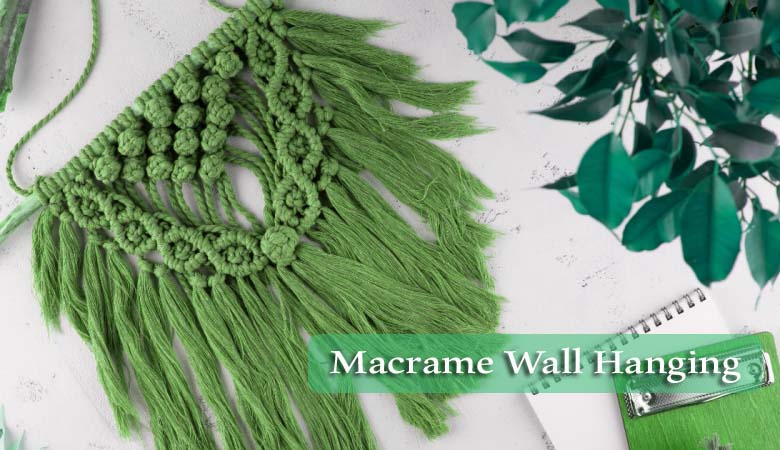
Macrame, the art of knotting cord or rope to create decorative patterns, has gained immense popularity in recent years. One of the most striking macrame creations is a large wall hanging that can instantly transform the look of any room. If you’re interested in adding a unique and personalized touch to your home decor, making a large macrame wall hanging is a fantastic project to undertake. In this article, we will guide you through the process step by step, ensuring that you can create a stunning piece that reflects your creativity and style.
Materials Needed
Before you start your macrame journey, gather the following materials:
- Macrame cord or rope: Choose a rope that suits your design preferences and the overall aesthetic you want to achieve. Natural fibers like cotton or jute are popular choices.
- Wooden dowel or metal rod: This will serve as the base for your wall hanging and provide support.
- Scissors: Invest in a pair of sharp scissors to easily cut through the rope.
- Measuring tape: Essential for accurately measuring the space where you plan to hang your creation.
- Comb or brush: Used to comb out and separate the strands of rope for a cleaner and neater look.
- Beads, feathers, or other decorative elements (optional): These can add a unique touch to your macrame wall hanging, allowing you to personalize it further.
Choosing the Right Rope
The type of rope you select for your macrame wall hanging plays a crucial role in its overall appearance and durability. There are various options available, each with its own characteristics. Consider the following factors when choosing the rope:
- Material: Natural fibers like cotton, jute, or hemp provide a rustic and organic look, while synthetic materials like nylon offer durability and a sleeker finish.
- Thickness: The thickness of the rope determines the size and visual impact of your wall hanging. Thicker ropes create bolder and more substantial designs, while thinner ropes are ideal for delicate and intricate patterns.
- Color: Decide whether you want a natural, neutral-toned wall hanging or one with vibrant and contrasting colors. You can choose a single color or opt for a combination of hues to match your decor.
- Texture: Some ropes have a smooth texture, while others may be twisted or have a more pronounced weave. Consider the texture that aligns with your aesthetic preferences.
Measuring and Planning
Before you dive into creating your macrame wall hanging, take the time to measure the wall space where it will be displayed. This step is crucial in determining the appropriate size and proportion of your design. Use a measuring tape to record the dimensions accurately.
Next, plan the layout and design of your wall hanging. Consider the following:
- Overall Size: Based on your measurements, decide how large or small you want your wall hanging to be. Consider the space it will occupy and how it will interact with other elements in the room.
- Design Elements: Determine if you want to incorporate specific patterns, shapes, or motifs into your macrame. Sketch out your ideas on paper or use online design tools to visualize different arrangements.
- Knot Placement: Plan where you want to place different knots and how they will interact to create your desired design. This will help you stay organized and avoid mistakes during the knotting process.
By measuring and planning beforehand, you can ensure that your macrame wall hanging will fit perfectly in your desired space and turn out exactly as you envision.
Basic Macrame Knots
To create a beautiful macrame wall hanging, it’s essential to master a few basic knots. These knots form the foundation of macrame designs and allow you to build upon them to create intricate patterns. Here are four fundamental knots to get you started:
- Square Knot (SK): The square knot is a versatile knot that forms a square-shaped pattern. It is created by crossing two strands of rope and tying them in a specific sequence.
- Lark’s Head Knot (LHK): This knot is used to attach the rope to the base, such as a wooden dowel or metal rod. It creates a loop that secures the rope in place.
- Half Hitch Knot (HHK): The half hitch knot is formed by wrapping one strand of rope around another and pulling it through the loop. It can be used to create texture and depth in your design.
- Spiral Knot (SPK): The spiral knot adds a twisted effect to your macrame wall hanging. It involves twisting the rope as you tie a series of square knots, creating a spiral pattern.
Take the time to practice these knots until you feel comfortable and confident in executing them accurately. Once you have mastered these basics, you can experiment with more complex knotting techniques and create intricate designs.
Starting the Wall Hanging
To begin your macrame wall hanging, follow these steps:
- Cut the rope: Measure and cut several lengths of rope, ensuring they are long enough to reach your desired length when folded in half. The number of ropes you’ll need depends on the thickness and fullness you want for your wall hanging. It’s recommended to start with at least eight to ten ropes.
- Attach the ropes to the base: Take one rope and fold it in half. Place the folded end under the base (wooden dowel or metal rod) to form a loop. Pull the loose ends of the rope through the loop and tighten it to secure it in place. Repeat this step for each rope, evenly spacing them along the base.
- Create the foundational knots: Begin by working with two adjacent ropes. Take the left rope and cross it over the center ropes, forming a “4” shape. Take the right rope and place it over the tail of the left rope, then pass it under the center ropes and through the loop of the “4” shape. Pull both ends tightly to create a square knot. Repeat this process with the same two ropes, but this time start with the right rope, creating another square knot. Continue alternating between left and right, tying square knots with the adjacent ropes.
- Continue knotting: Once you’ve completed the first row of square knots, move on to the next set of adjacent ropes and repeat the process. Gradually, the knots will begin to form a pattern and create the body of your macrame wall hanging. Continue knotting row by row until you reach the desired length.
Creating Patterns and Designs
Now that you have a solid foundation of basic knots, it’s time to explore different patterns and designs for your macrame wall hanging. Here are a few techniques you can incorporate:
- Alternating Square Knots: Create a simple yet elegant pattern by alternating the direction of your square knots. For example, tie two square knots with the left rope, followed by two square knots with the right rope. Repeat this pattern to create a textured and balanced design.
- Diagonal Lines: Experiment with diagonal lines by selectively omitting ropes from certain knots. By skipping a rope in specific knots, you can create diagonal patterns that add visual interest to your wall hanging.
- Chevron Patterns: Chevron patterns are popular in macrame and can be achieved by grouping the ropes into sets of two or more. Create a row of square knots with one set, then repeat the pattern with the next set, but reverse the order. This will result in a V-shaped chevron pattern.
- Incorporating Beads or Feathers: Add a touch of uniqueness by incorporating beads or feathers into your macrame design. Thread them onto individual ropes before tying the knots, or attach them sporadically throughout the piece.
Remember to step back frequently and assess your progress. This will help you make adjustments and ensure your design is symmetrical and visually appealing.
Adding Fringe and Decorative Elements
To give your macrame wall hanging a finished look, consider adding fringe or other decorative elements. Fringe can be added to the bottom of the wall hanging to create texture and movement. Here’s how to add fringe:
- Measure and cut the desired length of rope for the fringe. The length can vary depending on your preference.
- Fold each rope in half and create a loop at the folded end.
- Attach the fringe ropes to the bottom of your wall hanging using the Lark’s Head Knot. Insert the looped end of the fringe rope through the bottom row of knots, then pass the loose ends of the rope through the loop and pull tightly.
- Repeat this process across the entire bottom row, spacing the fringe ropes evenly.
Additionally, you can incorporate other decorative elements like beads or feathers by attaching them to individual ropes throughout your macrame design. This adds a personal touch and enhances the visual appeal of your wall hanging.
Finishing Touches and Hanging the Macrame
Once you’ve completed the knotting and added any desired fringe or decorative elements, it’s time to give your macrame wall hanging a polished finish and prepare it for hanging. Follow these steps:
- Trim excess rope: Use sharp scissors to trim any excess rope or fringe, ensuring a clean and uniform appearance. Take care not to cut the main body of the wall hanging while trimming.
- Comb or brush the ropes: Use a comb or brush to gently comb out and separate the strands of rope, giving your wall hanging a neat and tidy look. This step helps to define the individual knots and enhance the overall texture.
- Secure the knots: To ensure that your macrame wall hanging remains intact, apply a small amount of fabric glue or clear adhesive to the knots. This will prevent them from unraveling over time. Allow the glue to dry completely before handling the wall hanging.
- Choose a hanging method: There are several options for hanging your macrame wall hanging. You can use a wooden dowel, a metal rod, or even a decorative branch as the hanging mechanism. Attach the hanging device securely to the wall using nails, hooks, or adhesive hooks, depending on the weight of your wall hanging.
- Hang your creation: Carefully hang your macrame wall hanging on the chosen device, ensuring that it is level and centered. Step back and admire your handiwork as it enhances the beauty of your space.
Care and Maintenance
To keep your macrame wall hanging looking its best for years to come, follow these care and maintenance tips:
- Dust regularly: Use a soft brush or a hairdryer on the lowest setting to remove dust and debris from your wall hanging. Be gentle to avoid damaging the delicate knots.
- Spot clean: If your wall hanging gets dirty or stained, spot cleans it with a mild detergent and a soft cloth. Gently dab the affected area without rubbing or scrubbing.
- Avoid direct sunlight: Prolonged exposure to direct sunlight can cause the rope to fade and weaken over time. Hang your macrame wall hanging in a location where it is protected from harsh sunlight.
- Prevent tangling: If you need to move or store your wall hanging, take care to prevent the ropes from tangling. Fold it carefully and store it in a clean, dry place.
By following these simple care practices, you can ensure that your macrame wall hanging remains in excellent condition and continues to enhance the aesthetic of your space.
Showcasing Your Creation
Once your large macrame wall hanging is complete and displayed, it’s time to showcase it proudly. Here are a few ideas for displaying your creation:
- Living room focal point: Hang your wall hanging above a couch or fireplace to create a stunning focal point in your living room.
- Bedroom accent: Add a touch of bohemian charm to your bedroom by hanging the macrame wall hanging above the bed as a headboard alternative.
- Statement entryway: Make a bold statement by showcasing your wall hanging in the entryway or foyer, welcoming guests with its intricate beauty.
- Outdoor oasis: If your macrame wall hanging is made with weather-resistant materials, consider displaying it on a covered porch or patio to add a touch of elegance to your outdoor space.
- Gallery wall: Create a gallery wall by combining your macrame wall hanging with other artwork or framed photographs. This adds depth and visual interest to any room.
Get creative and experiment with different placements and combinations to find the perfect spot to showcase your unique macrame creation.
Inspiration and Further Resources
If you’re seeking inspiration for your macrame wall hanging or want to dive deeper into the art of macrame, here are some resources to explore:
- Online platforms: Visit websites such as Pinterest, Instagram, and Etsy for a wealth of macrame inspiration. You’ll find a plethora of macrame designs, patterns, and tutorials created by talented artisans and craft enthusiasts.
- Books and magazines: Explore the world of macrame through books and magazines dedicated to this art form. Look for titles like “Macrame for Beginners,” “The Complete Guide to Macrame,” or “Macrame Home Decor Ideas.” These resources provide step-by-step instructions, tips, and inspiration to help you create stunning macrame pieces.
- Workshops and classes: Consider attending local macrame workshops or enrolling in online classes. These interactive sessions offer hands-on learning experiences and allow you to connect with fellow macrame enthusiasts. You’ll gain valuable insights, refine your skills, and discover new techniques.
- Community forums and groups: Join online macrame communities and forums where you can interact with fellow enthusiasts, share your creations, ask questions, and seek advice. These communities are excellent sources of support and inspiration, and you may even make new friends who share your passion for macrame.
Remember, the art of macrame is a journey of creativity and self-expression. Embrace the process, allow your imagination to soar, and enjoy the therapeutic and fulfilling experience of creating your large macrame wall hanging.
Conclusion
Creating a large macrame wall hanging is a wonderful way to add a unique and artistic touch to your space. By choosing the right rope, measuring and planning meticulously, mastering basic knots, and experimenting with patterns and designs, you can craft a stunning piece of macrame art that reflects your personal style.
Taking care of your macrame wall hanging and showcasing it in various settings allows you to enjoy its beauty and appreciate its intricate craftsmanship. Seek inspiration from online platforms, books, workshops, and communities to further enhance your macrame skills and creativity.
So gather your materials, unleash your creativity, and embark on this delightful macrame journey. Discover the joy of creating a large macrame wall hanging that not only enhances your space but also becomes a cherished work of art.
FAQs (Frequently Asked Questions)
Can I make a large macrame wall hanging if I’m a beginner?
Absolutely! While macrame may seem intricate, it’s a craft that can be learned by beginners. Start with simple patterns and knots, practice regularly, and gradually work your way up to more complex designs.
Header text
What kind of rope is best for a macrame wall hanging?
The choice of the rope depends on your desired aesthetic and durability. Natural fibers like cotton or jute are popular for a bohemian look, while synthetic materials like nylon offer strength and a sleek finish.
How long does it take to make a large macrame wall hanging?
The time required depends on the size, complexity of the design, and your level of experience. It can range from a few hours to several weeks. Enjoy the process and take your time to create a piece you’re proud of.
Can I customize the colors and patterns of my macrame wall hanging?
Absolutely! Macrame allows for endless customization. Choose colors that complement your decor and experiment with various patterns and knot combinations to create a unique piece that reflects your style.
How do I hang my macrame wall hanging securely?
Consider using hooks, nails, or adhesive hooks designed to support the weight of your wall hanging. Ensure that the hanging device is securely fastened to the wall and capable of supporting the weight of the macrame.


